
Introduction to ServerU Installer
 ServerU Netmap series is a perfect 1U network appliance for medium-sized companies and organizations. It's powered with 6 Intel Gigabit LAN with independent RX and TX multithread queues, MSI-X supported and ready prepared for Netmap high performance packet processing.
In order to ease the maintenance of ServerU by customers themselves, we created ServerU Installer, a simple application, light and very easy to use. With this app you can install any compatible Operating System you like in your ServerU.
From FreeBSD to Ubuntu; from pfSense to Endian and Mikrotik, the ServerU Installer offers several Operating Systems, ready for you to use and already properly configured for your ServerU model.
Install, format, change the Operating System is now easier than ever. Follow this manual carefully and enjoy your machine. ServerU Inc is at your disposal if you further support.
Creating a Recovery Flash Drive
- ServerU Installer Image (Download at https://download.serveru.us/ServerUinstaller) (410Kb)
- Any Flash Drive
Download the image to your computer and follow the steps below.
Windows
To copy the file “serveruinstaller.img” to your flash drive, you should use the application Win32Image. This App is Free and Easy to install. Follow the steps bellow to transfer the image to your Flash Drive. Be careful, your FlashDrive (Pendrive) will be formatted during this process. Backup your data before proceding with this instructions.
Click here to download ServerU Installer to your machine. As soon as you click, Internet Explorer will ask you if you want do open or save the file. Click "Save" as we are going to use this file later on this tutorial.

Since Windows 7, Internet Explorer save downloaded files inside "Downloads" folder located inside your User's Home Folder. The default location for downloaded files may vary depending on your Browser, please check the default location for downloaded files inside your Browser's preferences menu.
Now it's time to download Win32Image application. Please, click here or access this web site: http://sourceforge.net/projects/win32diskimager/files/latest/download . The download takes about 2 minutes to complete. The size of Win32Image File is 18.3Mb. If the size is different, please DO NOT DOWNLOAD and contact our support team as soon as possible.
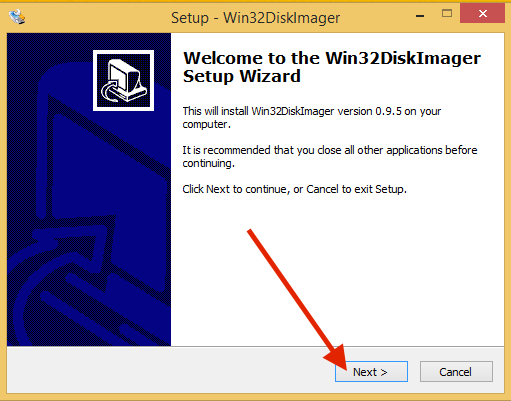
Double-click the Win32Image installer and follow on screen steps to install the application.
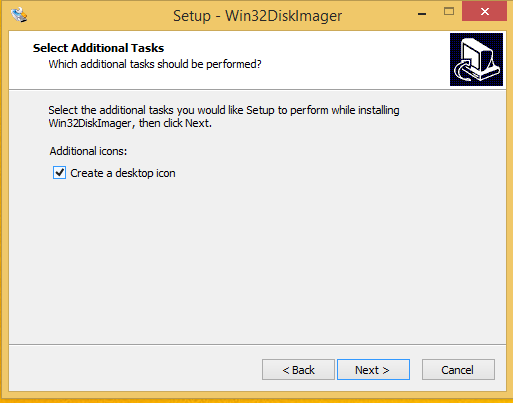
Select "Create a desktop icon" to create a desktop icon inside your Desktop. It'll be easier to find Win32Image app later.
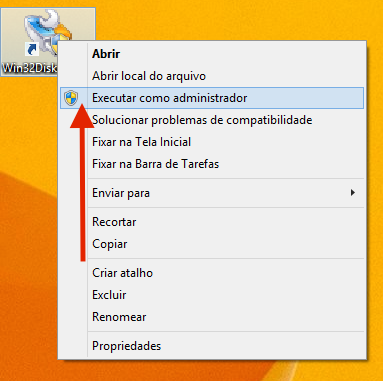
Right-click the Application and execute it as administrator.
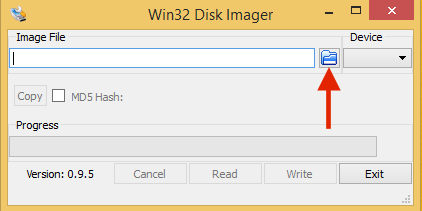
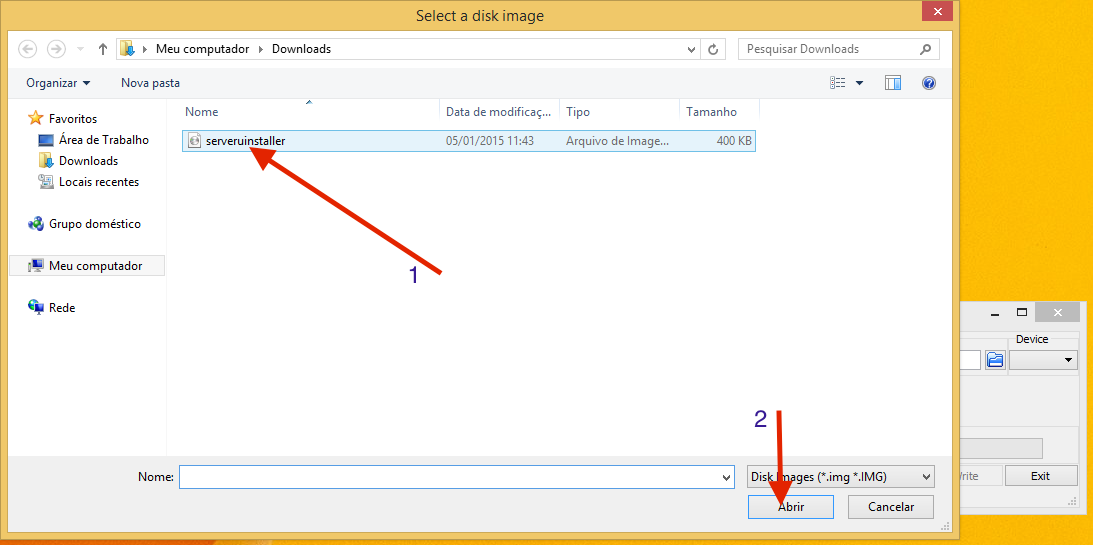
Click on the folder inside Win32Image Application. A dialog will open for you to point to serveruinstaller.img you downloaded earlier. Please, select it and apply.
Insert your Flash Drive on your computer and it will be identified by the Win32Image application. A mount point letter of your pendrive will be listed inside "Devices" menu.If there are more than one flash drive on your computer, select the letter corresponding to the flash drive you want to install ServerU Installer.
Click Write to copy the image to your flash.
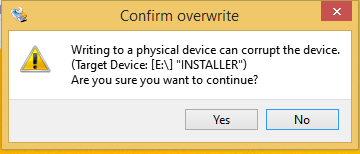
Your pendrive will be erased!! Backup your data before proceed..
The copy takes 1 second to finish. It's only 400k. Click OK to finish.

Now, plug your Flash Drive to your ServerU Machine and turn it on to initiate ServerU Installer. When ServerU detects that a Flash Drive is inserted, it automatically change the boot priority to the Flash Drive. You don´t have to worry about changing this manually on BIOS.
FreeBSD, OS X, Linux
Identify the device that was associated with yout Flash Drive. Unix based systems recognize Flash Driver as devices and put them inside the folder /dev/.
Common examples:
OS X - /dev/disk1
FreeBSD - /dev/ada0
Linux - /dev/sdb
Linux - /dev/sdc
After identifying which is your Flash Drive, use “dd” command.
Make sure to be in the same directory as the file " serveruinstaller.img " you downloaded earlier.
Type the command “dd if=serveruinstaller.img of=<Flash Drive Device>”
Example: “dd if=serveruinstaller.img of=/dev/sdc”
Now, plug your Flash Drive to your ServerU Machine and turn it on to initiate ServerU Installer. When ServerU detects that a Flash Drive is inserted, it automatically change the boot priority to the Flash Drive. You don´t have to worry about changing this manually on BIOS.
Available Operating Systems
- BSD based Systems
- FreeBSD
- pfSense
- ProApps
- OpenBSD
- NetBSD
- DragonflyBSD
- Linux based Systems
RouterOS (Mikrotik)(Only available on ServerU L100 model)- Vyatta / VyOS
- Endian Linux
- Debian
- CentOS
- Ubuntu
- Fedora Core
- Red Hat
- SuSE Enterprise
- ClearOS
The above operating systems are not only supported by ServerU. They are tested, certified and formally supported to run on ServerU server hardware. Isn't your desired OS listed? Feel free to contact us, if it's BSD or Linux based, we will test it, certify it's performance and functionalities, fully commit to support it on ServerU and, 48 hours after that, provide it to be installed via ServerU Installer.
First Steps
Knowing your Hardware
At the rear of the machine can see the energy input and the "Power" button. The button allows you to turn on/off the hardware.
Just like ATX computers, ServerU can start the shutdown process just with a click on this button. If the system crashes, for some reason, press the "Power" button for more than 5 seconds will force a complete shutdown.
When you energize your ServerU it will turn on automatically. This is normal behavior. The machine is programmed to turn on immediately when receiving power. This behavior is common for servers that need to be up all the time. In case of power outage, when power resumes, the machine automatically turns on.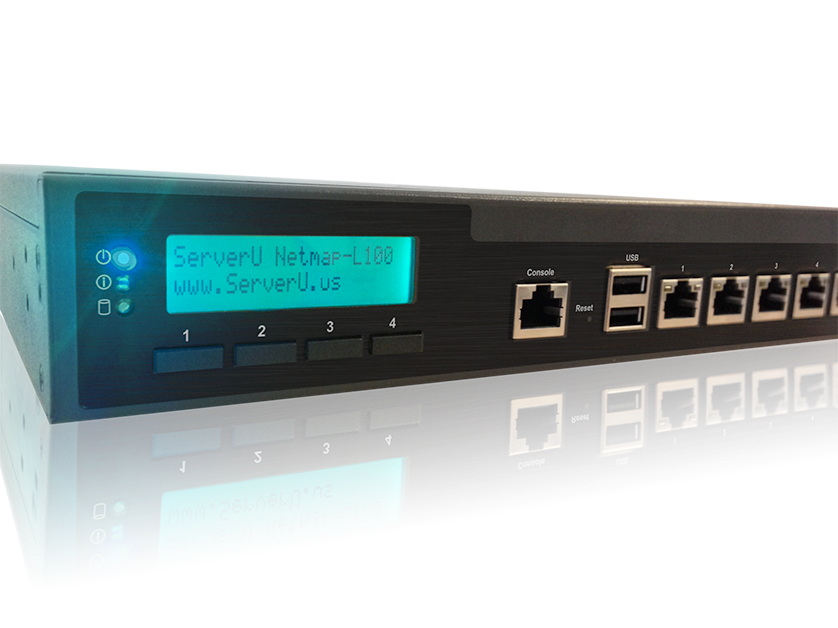
The console port, USB port and network interface(1) are entries most often used in this manual. Pay attention get the instructions to configure your ServerU properly.
Plugging Cables
Ready to get started?
The first step we need to do is connect the cables. Follow the instructions and pictures below do connect the cables properly.
The ServerU comes with a black cord which is the "Console" port communication cable. This is the first cable that you should connect. This cable has a serial output and it will be responsible for all communication between our computer and ServerU. The whole communication is done by Serial (Console) port.
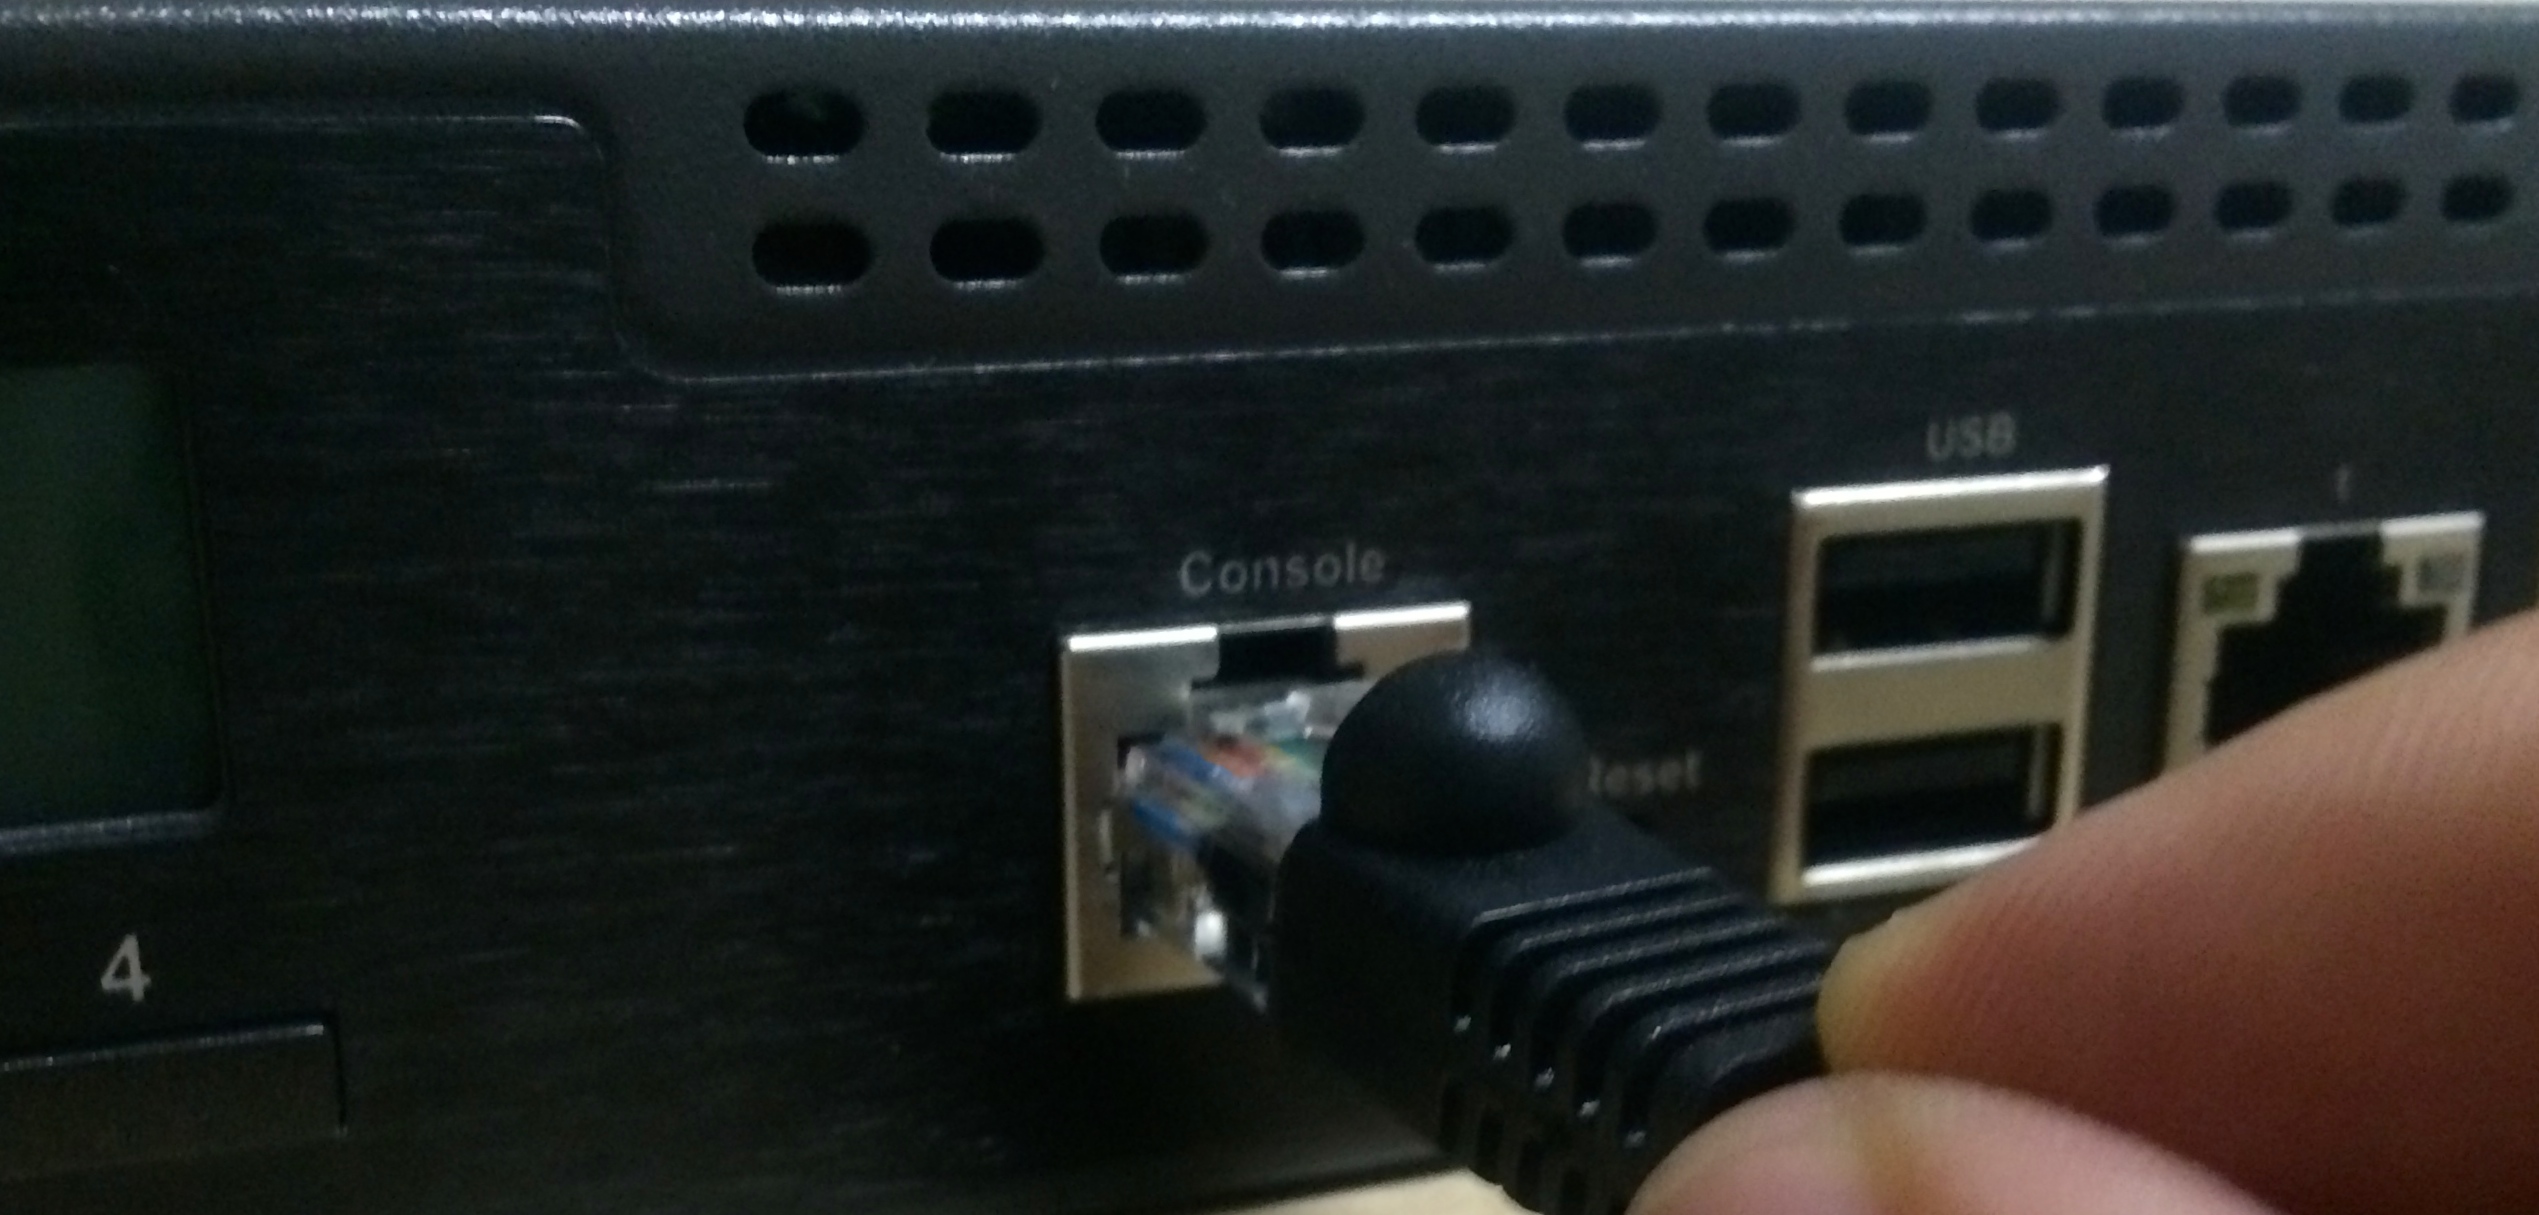
Plug the black cable into Serial Port.
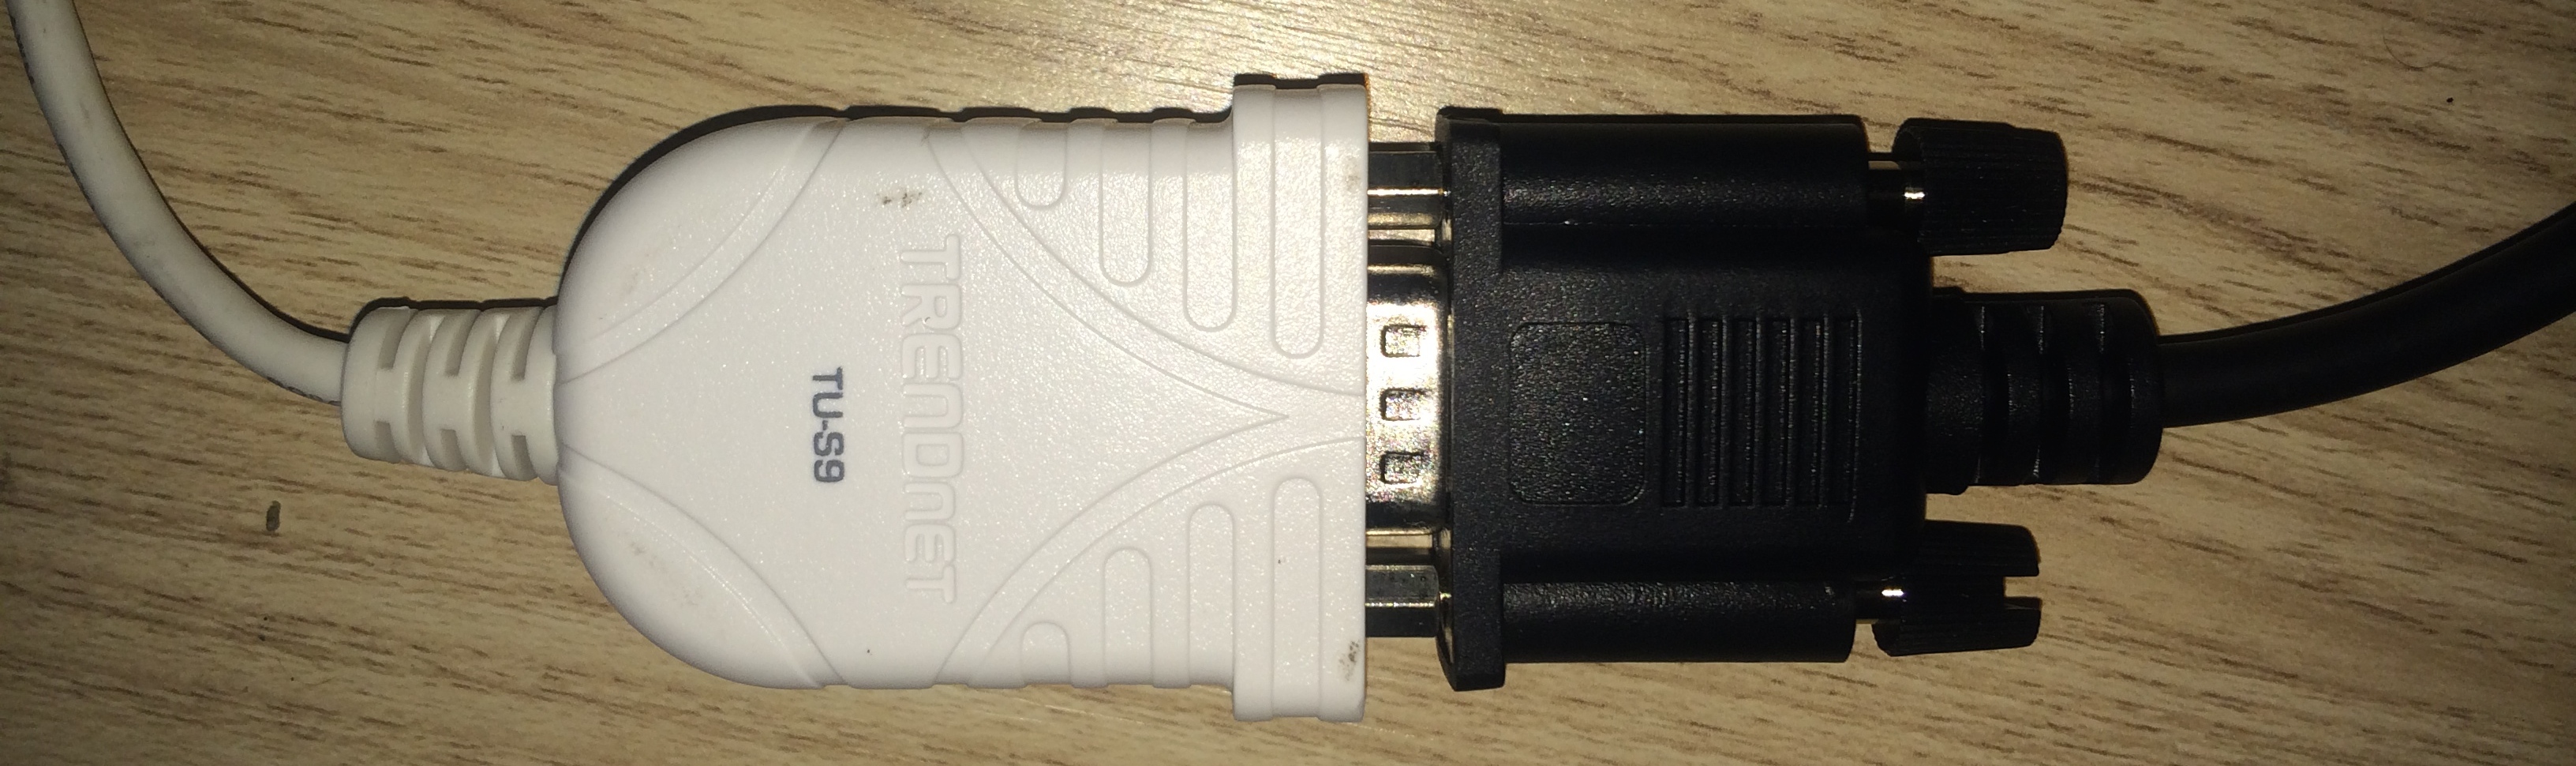
If your computer has a Serial Input, just connect the cable in your computer, otherwise you will need and adapter (Serial-USB) like the picture below:

These adapters are inexpensive items that can be purchased at any computer store. The USB output of your computer becomes a serial output. These adapters come with a CD with the necessary drivers for use. Please install the adapter drivers on your computer before proceeding with the instructions in this manual.
If an adapter is required, connect it to the serial cable that came with ServerU then connect the adapter to the USB port of your computer.
Now that the serial cable is in place, let's connect to the network.
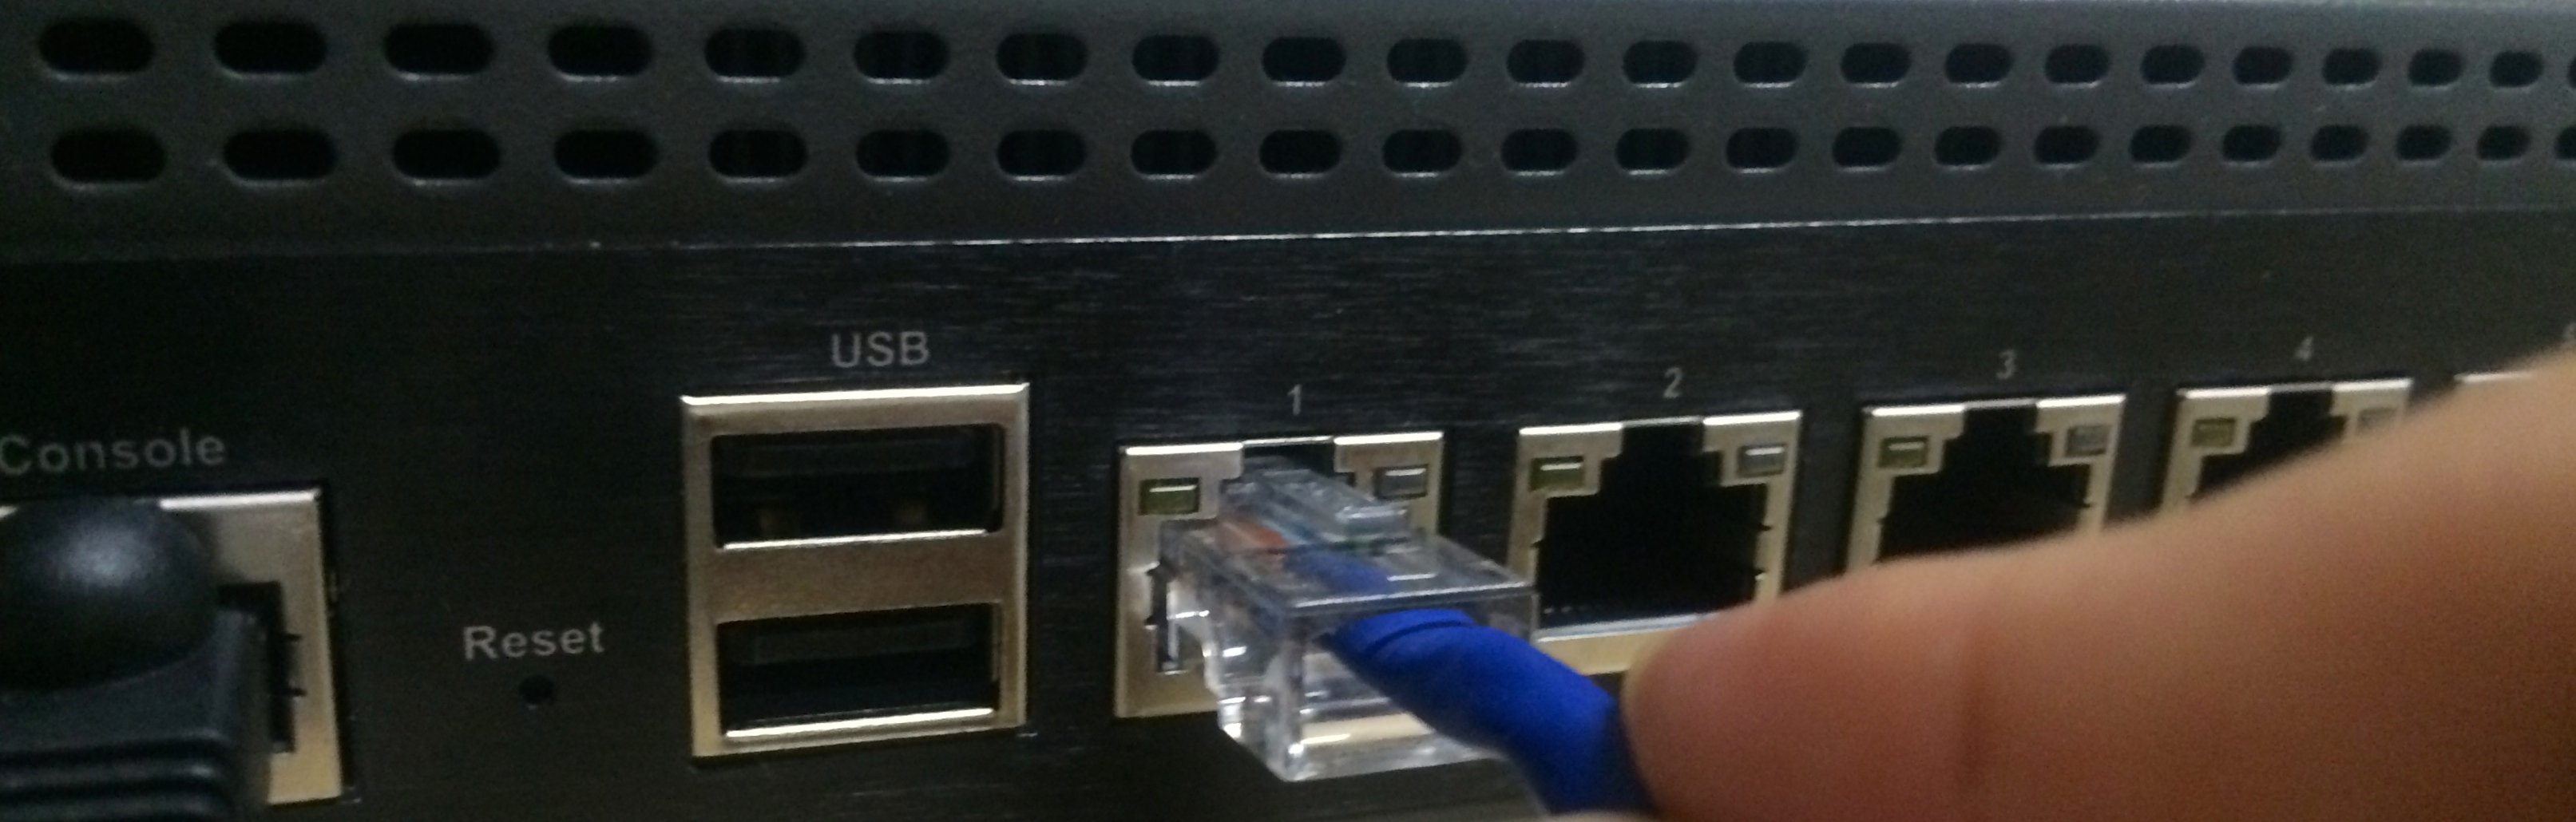
Plug Ethernet Cable on Interface 1.
We're almost there!. Plug Power Cable and push the "Power" button to turn ServerU ON.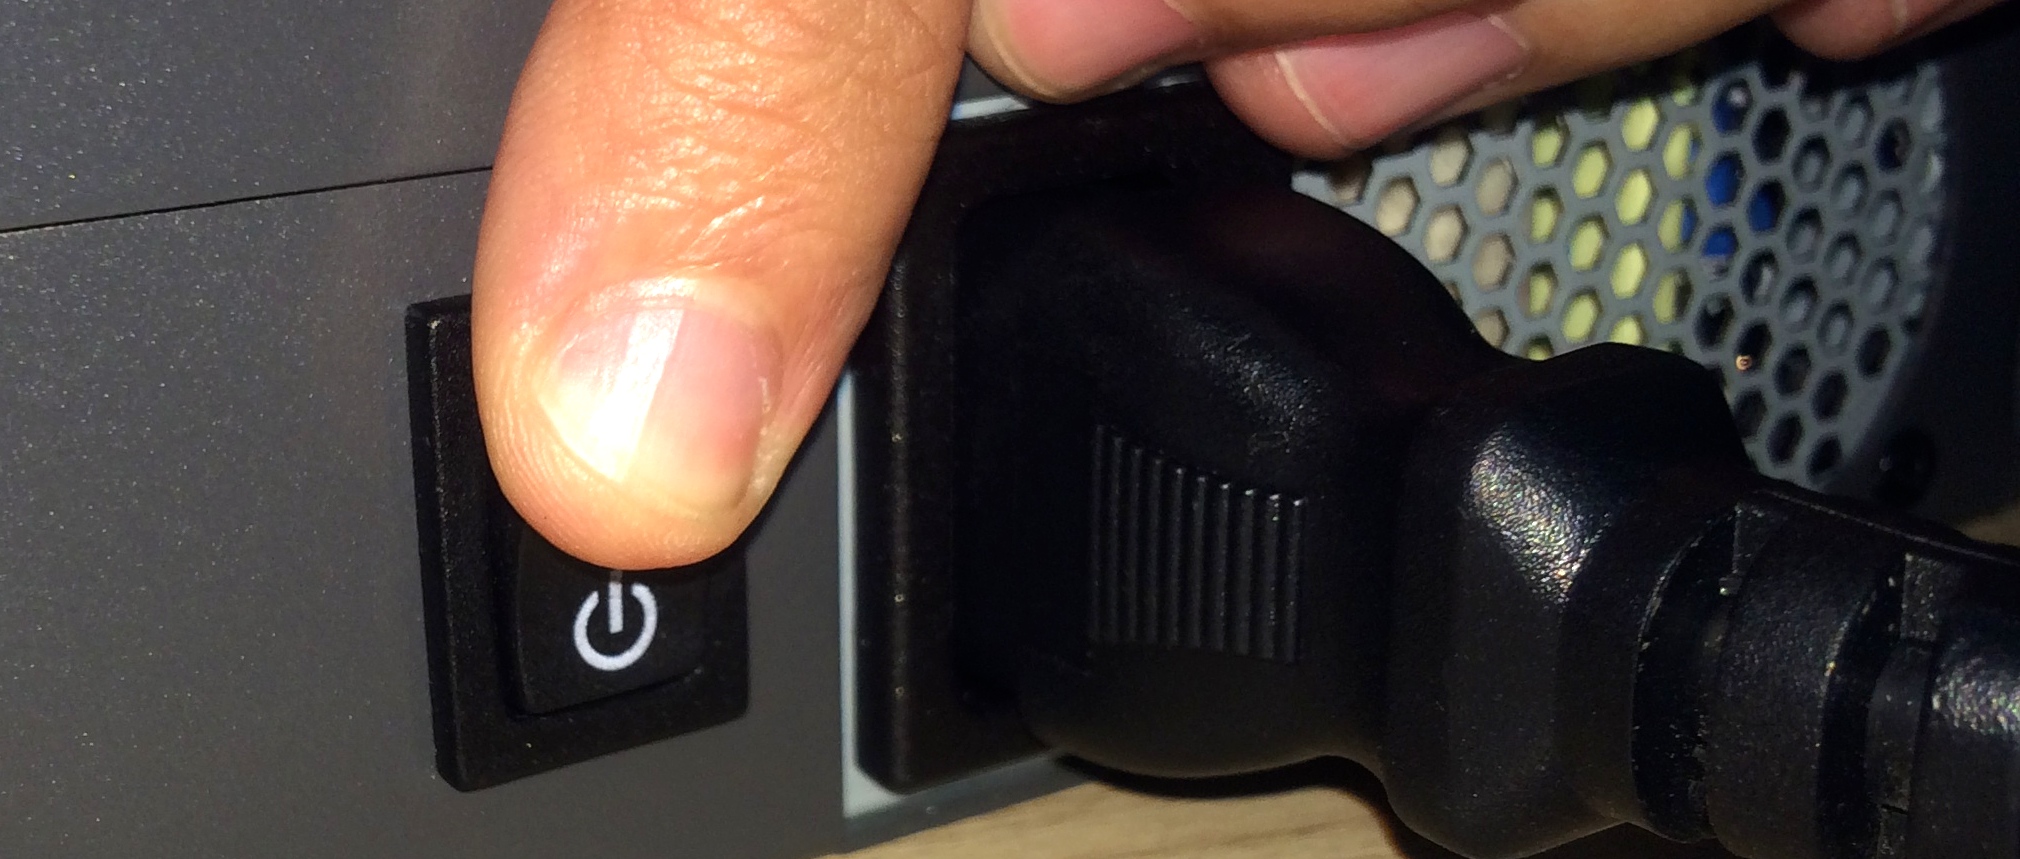
Connecting your computer to the serial port
Before connecting your ServerU into the Serial Port, verify the OS you are using on your computer. Configurations may vary for each OS. Make sure you are logged with an user with Administrator priviledges to continue.

FreeBSD:
Inside FreeBSD OS, the serial port is recognized as /dev/cuaaX or /dev/ttyuX depending on your version of FreeBSD, where X is the number of the port (0 for the first serial port, 1 for the second...). Access the Serial Port using the cu(1) command:
cu -l /dev/ttyu0 -s 38400
If you have an older version of FreeBSD use:
cu -l /dev/cuaa0 -s 38400
If you are using an adapter (USB-SERIAL) you need to access the port directly:
cu -l /dev/ucom0 -s 38400
Apple (OS X):
On OS X, you need to install the adapter drivers first: PL2303_MacOSX_v1_5_1.zip or FTDI_MacOSX_v2.2.18.zip to control the serial port. These drivers are available from the link: http://pbxbook.com/other/mac-tty.html. Once installed, access the Serial Port with:
cu -l /dev/cu.usbserial -s 38400
Linux:
Once connected, the Serial Port will be recognized as /dev/ttyS0 or /dev/ttysUSB0 if you use an adapter (USB-SERIAL). Acess the Serial Port using the cu(1) command:
cu -l /dev/ttyS0 -s 38400 or cu -l /dev/ttyUSB0 -s 38400
Depending on your Linux version, you will not be able to write on your devices. Even if you are root. In this case, just change the permissions of these files:
chmod 660 /dev/ttyUSB0
chmod 660 /dev/ttyS0
Set the correct permissions for your user if you are not using root:
chown :yourgroup /dev/ttyUSB0
chmod 660 /dev/ttyUSB0
Windows:
You can access the Serial Port in Windows using the Hyper Terminal application:
Programs -> Accessories -> Comunication -> Hyper Terminal
Or you can use PUTTY or any other option that fits the purpose of a terminal that can connect to a Serial Port. Use the configurations of yout terminal to access the serial port, usually COM1 or COM2.
You can use the Utilyties screen or minicom in place of cu command.
When you successfully conect to the serial port, a message will be shown in yout terminal like the picture below.

Installing an Operating System
This chapter discusses procedures for installing an operating system, taking into account that your ServerU is new and there is no system pre-installed.
If you have already installed an OS and wnat to remove it or format your ServerU, take a look at the chapter "Creating a Recovery Flash Drive" to create a Flash Drive that will boot ServerU Installer on your machine.
With the Serial Console properly connected to your computer´s terminal, Turn ON the ServerU. If the ServerU is already ON, please, turn it OFF, wait a few seconds an then turn it ON again.
If this is the first time you are using your ServerU, don't worry, ServerU Installer Application is already installed in ServerU's Flash Card by default. If you have previously installed an OS, be sure to create a "Flash Drive Recovery" before continuing.
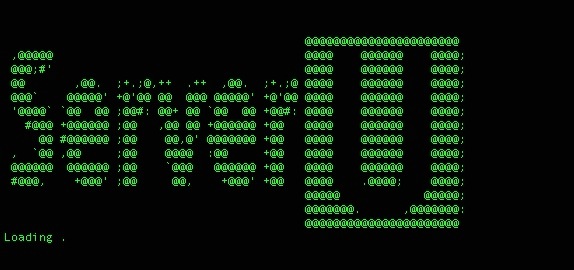
As soon as you turn ON your machine ServerU Installer will be loaded.
Please wait while it loads the necessary components to start. Follow the process through "loading" on screen.
When ServerU Installer is loaded you will see a menu with a lot of languages to choose from. Please select the language you want to use.
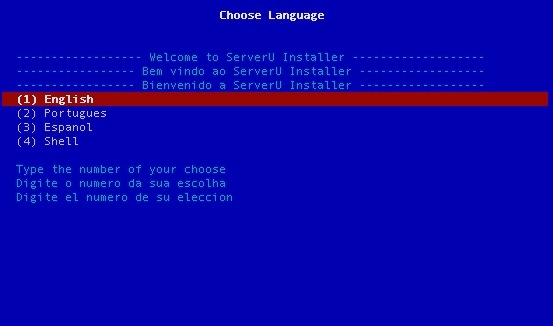
To select a language, just press the number that is displayed in front of the language name. Example: 1 for English, 2 for Portuguese...
Now you need to setup network settings. You need to configure this so ServerU Installer can access the Internet and Download the next steps. Two options are available: Static IP and Dynamic IP (DHCP).

Again, press the number corresponding to the desired option. Let's address the two forms of connection below, although only one form is required for the ServerU to connect to the internet depending on your local network settings.
Remember to connect Ethernet Cable on Interface 1 to proceed.
DHCP
If you select DHCP, ServerU Installer make a request to your DHCP Server. That way it gets automatically an IP, Route, DNS. The following information appears in your terminal.
At this moment the request is being made.
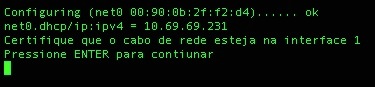
If the DHCP Server deliver a functional IP you will see it on your terminal. Press ENTER to continue.
Static IP
When you select this option, you can manually enter your network settings. When prompted, enter your settings.
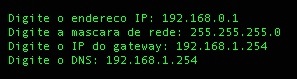
Enter your ipv4 settings as shown above, separating the bits with a period. Any errors typing these settings will take you to the network configuration panel again and you will have to repeat the process of setting up Network Settings or select DHCP.
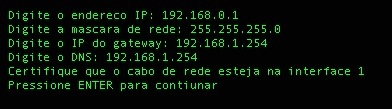
At the end, press ENTER to continue.
When you finish configuring the network, ServerU Installer will download files that are necessary for the next menus from our cloud servers. This process is automatic.

Once the settings are downloaded you will be redirected to the installation panel. In the installation menu you should choose the destination disk for the OS you are going to install
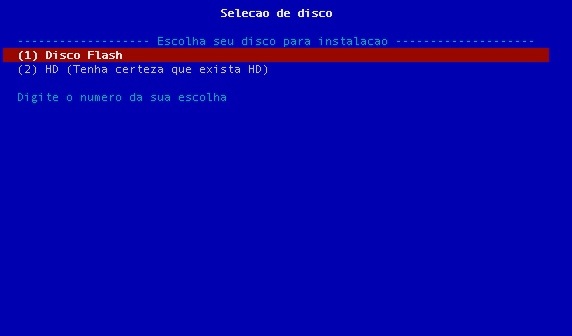
Again, press the number corresponding to the desired option. If you select the HD option, make sure that there is a Hard Drive installed on your ServerU, otherwise the system will not be installed and you will need to restart your ServerU. If this happens, just follow the steps of ServerU Installer from the beggining.
When selecting the Target Disk, select the OS you want to install on your ServerU.
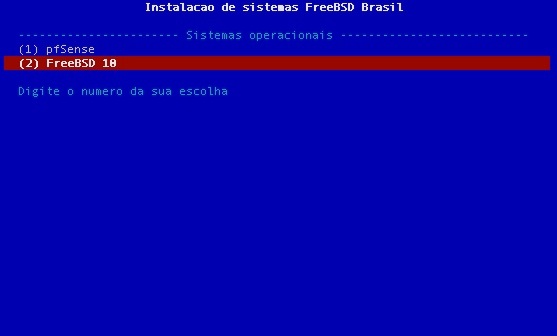
Can't you find your desired OS? Contact-us by phone or e-mail and request your system. The Operating System requested will be included inside ServerU Installer within 48 working hours. If the OS needs a license, it will be available with in Trial / Free version, the license being the sole responsibility of the user/cliet who will install the System.
Enter the number corresponding to the desired option to start the installation process.
After that files will be downloaded through the internet.

When the download of this files finish, ServerU Installer starts to build the installation tree and configurations. A message “ServerU Fetching…” will be shown in the LCD of your Hardware.
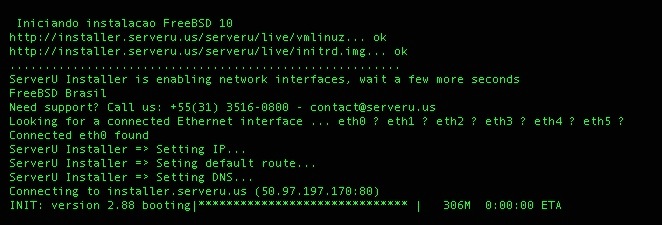
ServerU Installer then checks the network configurations and start the Download of the selected Operating System. Operating systems have on average 450Mb, however, this value can be different according to the selected operating system. UUbuntu and Debian are larger systems. FreeBSD, pfSense, Endian has an average of 250Mb.
Follow the process of downloading your OS. The download speed is directly related to the bandwidth of your internet. Always follow the process to see if there were errors during download.
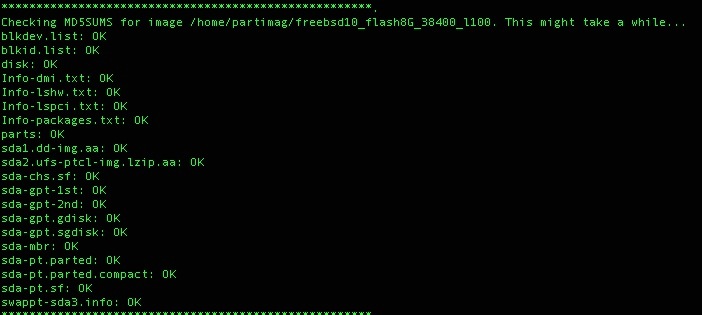
Once the download the OS finishes, all the instalation process are done Off-line, without using internet connection.
The ServerU Installer first checks the MD5 of the whole image and files that were downloaded. This ensures that you have downloaded from a trusted source and that no one has altered the image that you are installing.
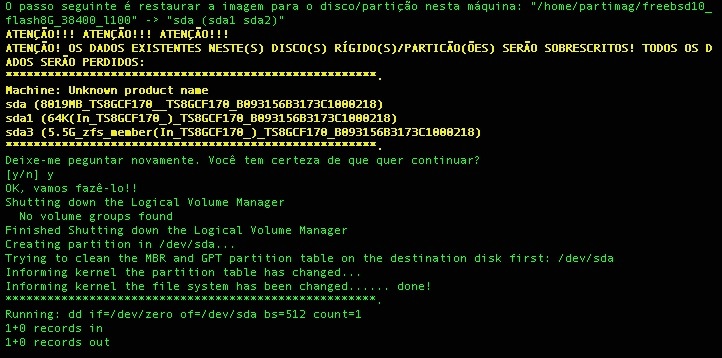
After the security check ServerU Installer asks if you really want to install the Operating System in your Flash Memory or HD (Yellow Warning in Terminal). This happens because the installation process erases all destination disk to create a new partition map, you lose all your data on the destination disk. Carefully check the information on your screen before proceeding. We are not responsible for any data loss that can be caused by ServerU Installer.
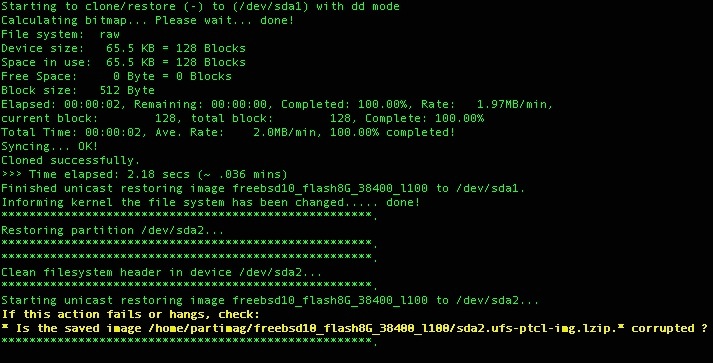
At this time, all the instalation is done automatically, with no interaction.
At the end, follow the final instructions in your terminal. It contains important information about how to connect to your new installed Operating System. Be aware of the following items:
- Console Speed
- Admin User Name
- Admin Password
- Address to access the system(http), if available.
These data will be necessary for you to have access to the OS you just installed. If the system you installed is compatible with the terminal speed of 38400, no changes should be made. If the installed OS has a different speed, please, nect to your machine using the speed designated for that system. Follow the steps in Chapter “Connecting your computer to the Serial Port” .
You have finished the process of installing an operating system on your ServerU. See how easy that is?
If you need support, contact-us by phone or e-mail.
ServerU Installer Troubleshooting
Please contact-us by phone or e-mail and send us the MAC Address of your ServerU. It will be registered in our system. If your equipment was delivered before the implementation of ServerU Installer, you may have this sort of problem.
2 - The OS I want to install is not listed in the list of available OS's
Please contact-us by phone or e-mail and request the inclusion of an operating system. The system will be provided inside your ServerU Installer within 48 working hours after we test it's performance, reliability, functionality and we add it to our supported FOSS operating system list.
 Rackmount kit included with 1U devices